1Connect a platform
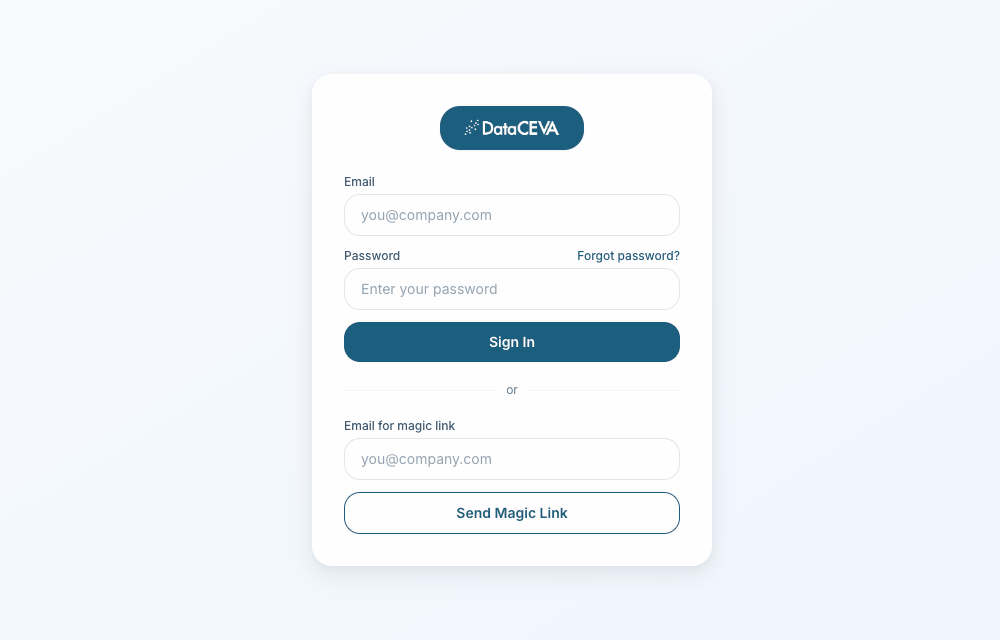
Enter your email and password, then click Sign In.
You'll see your agency dashboard.
From the sidebar, open Connections and expand the platform you want.
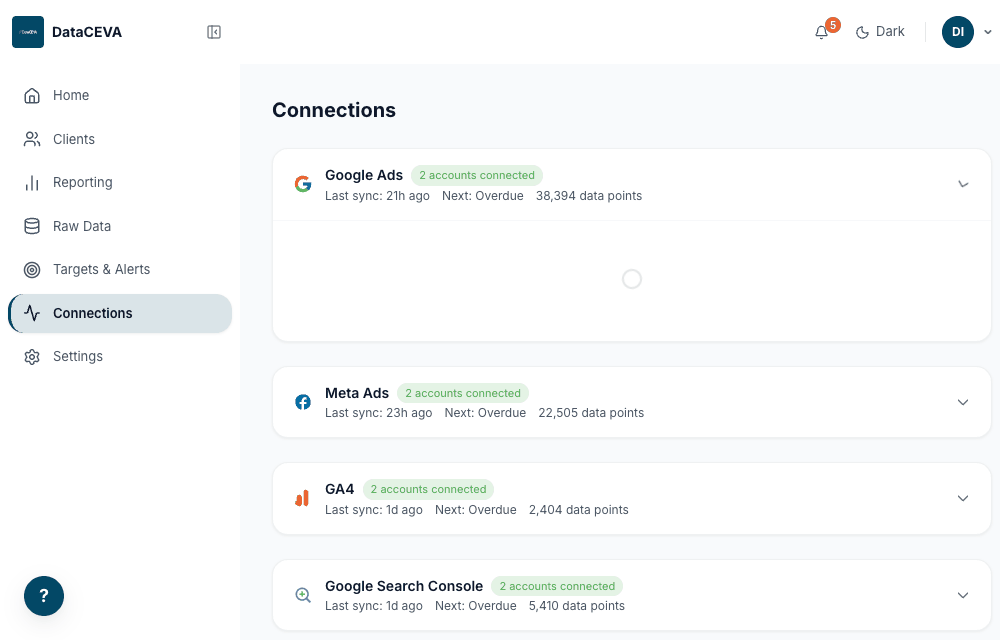
You'll see a card per platform with a green "connected" pill and last-sync time. Already-connected platforms list their accounts.
Click Connect Account (or + Add Account) and review the read-only consent.

You'll see what will happen and the permissions requested, then one button to continue to the provider.
Authorize, then pick the account
Sign in at the provider, then choose which account to connect and confirm.
You'll see the dashboard return to Connections; the first sync starts automatically and the account turns "Connected".
2Set targets & alerts, then monitor
Open Targets & Alerts to see your goals and their status dots.
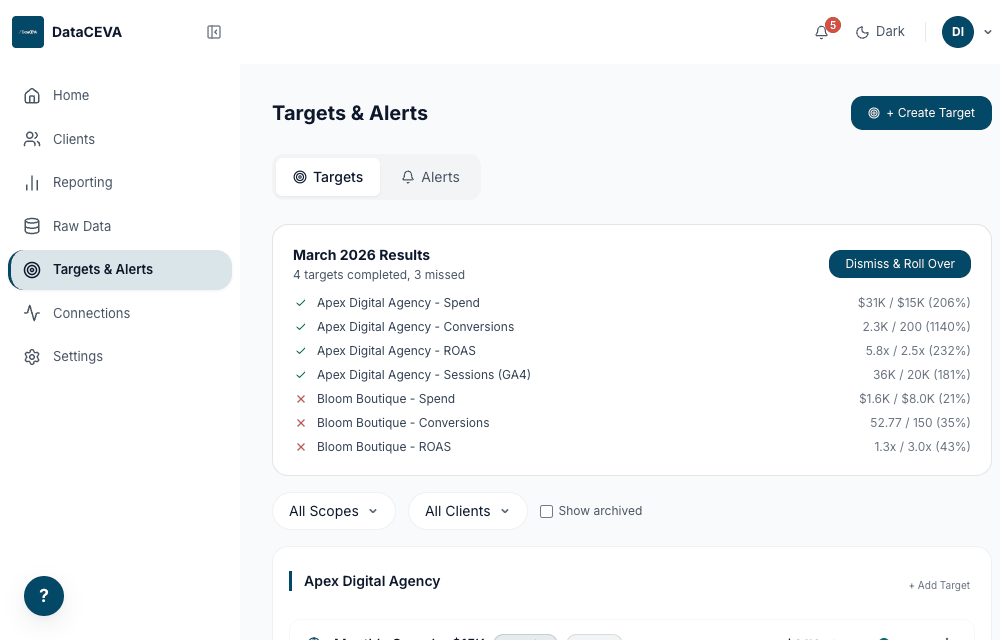
You'll see targets grouped by client, each showing actual vs goal and a green (on track) or red (behind) dot.
Click + Create Target, then set scope, platform, metric, condition, and value.
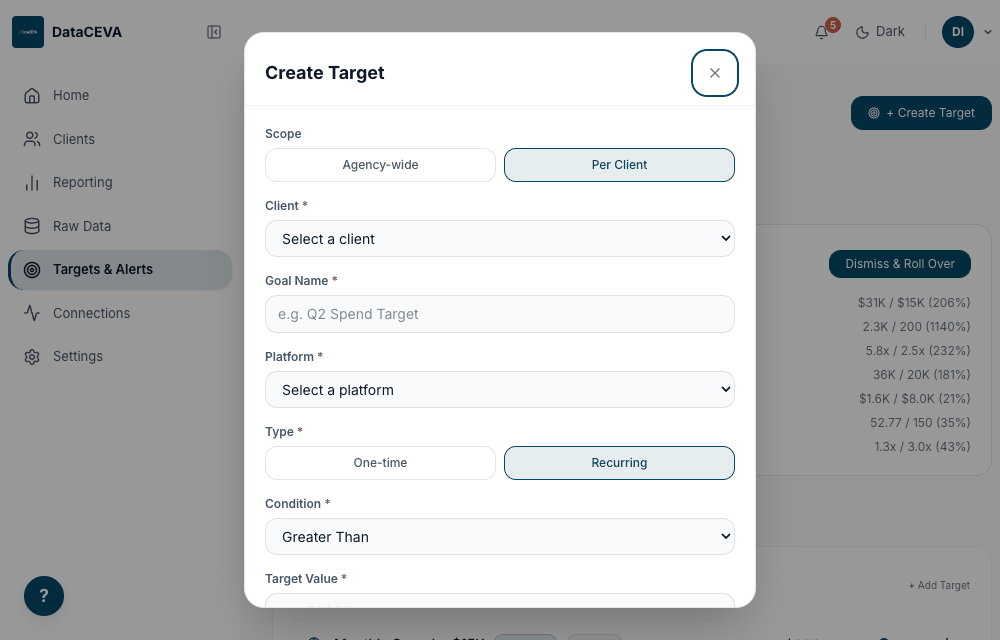
You'll see the new target appear in the list with its status dot.
Switch to the Alerts tab to see your threshold rules.
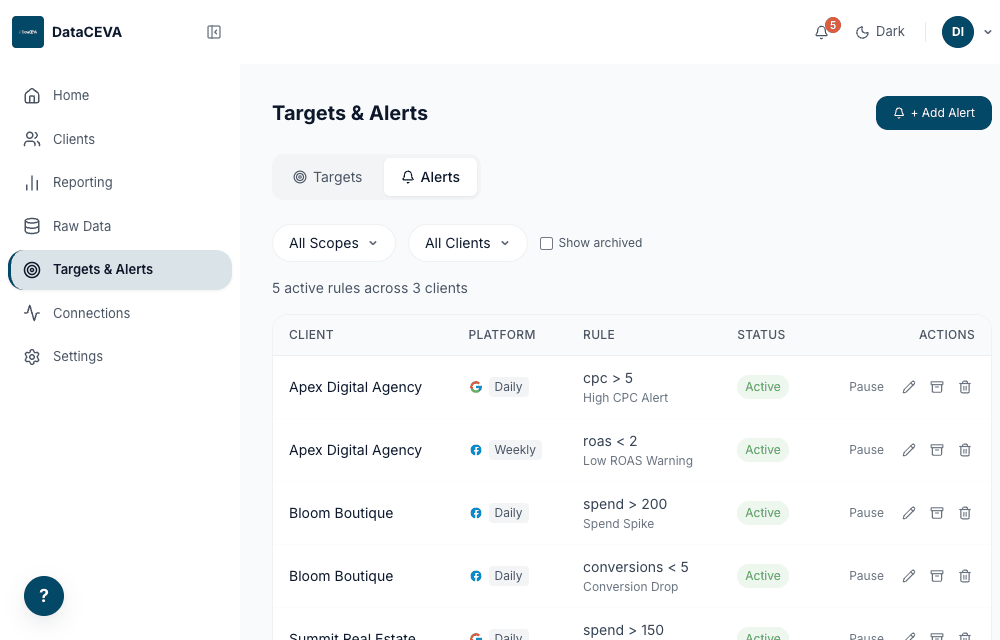
You'll see a table of rules: client, platform, the rule (e.g. "cpc > 5"), and status.
Click + Add Alert, then choose platform, metric, condition, value, and how often to check.

You'll see the rule added; it starts checking on its interval and notifies you when breached.
Go to Home and watch your KPIs against the goals you just set.
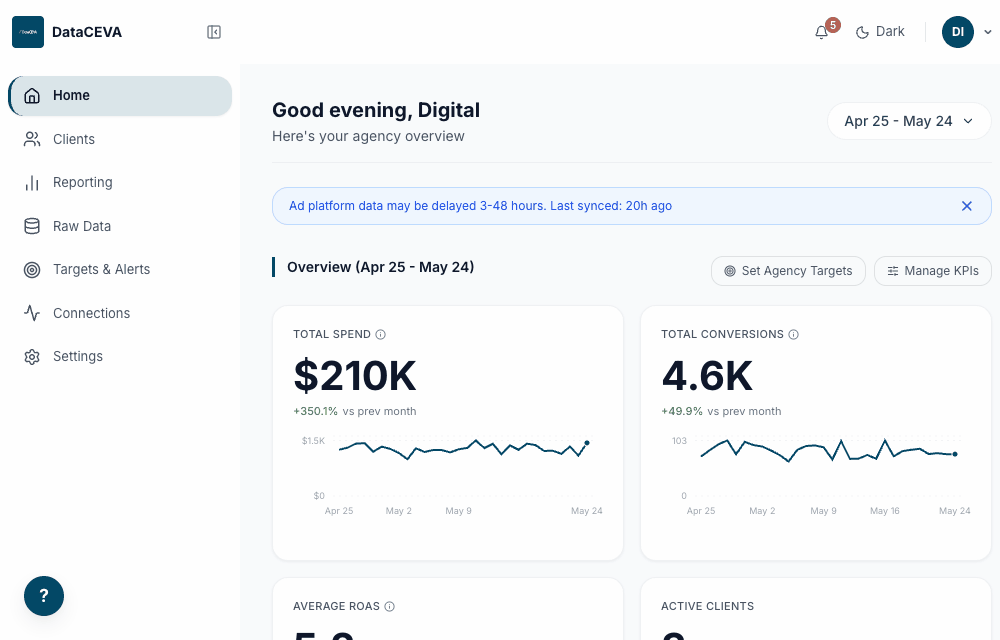
You'll see spend, conversions, ROAS and more with trend lines and vs-last-month deltas.
Open the bell in the top bar to read fired alerts; click View to jump to the rule.
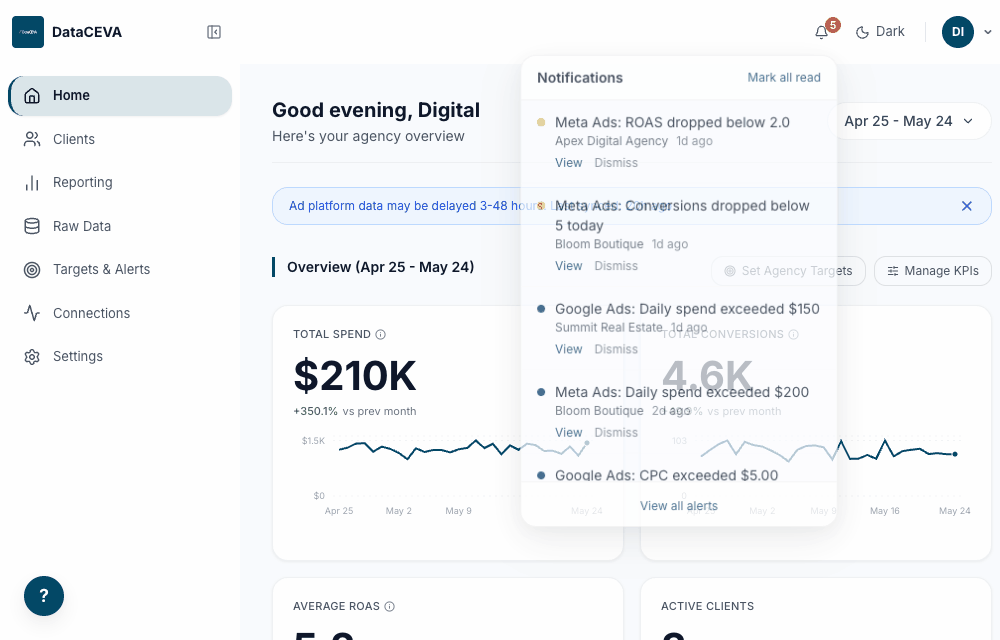
You'll see each alert with its message, client, and time, plus View and Dismiss.
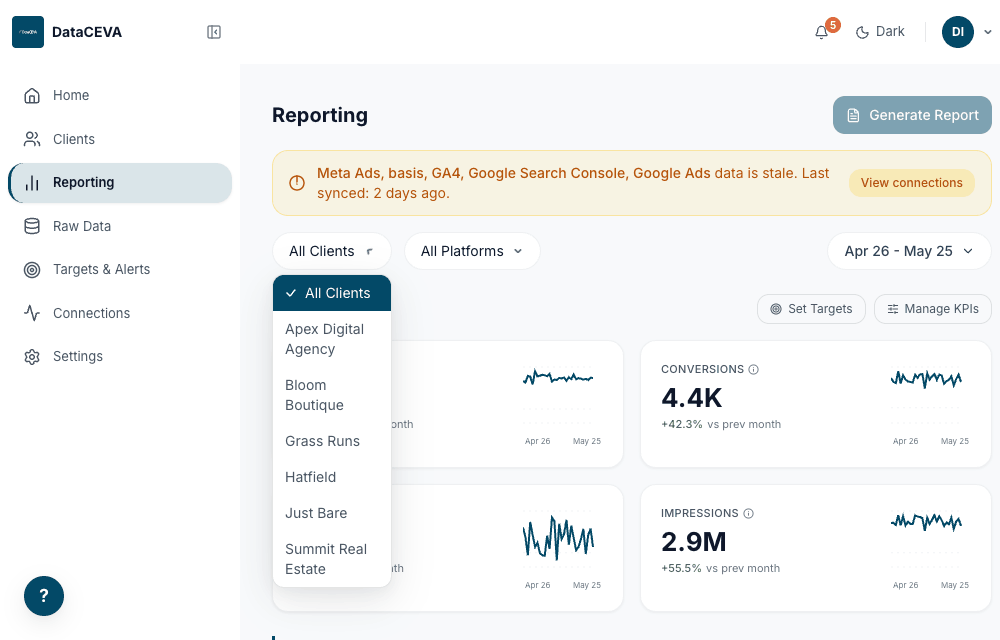
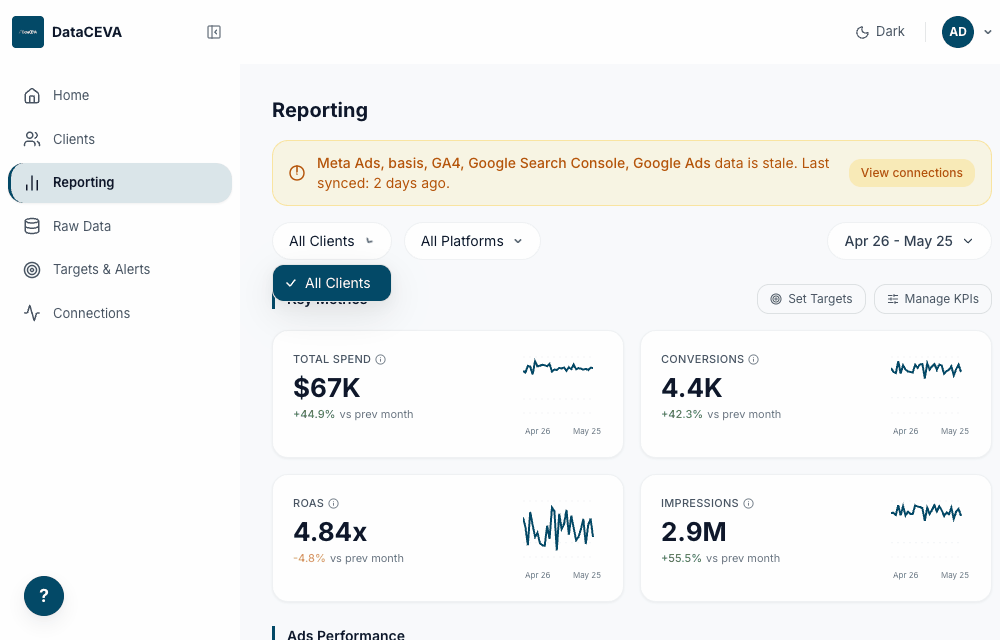
3Build & share a client report
Open Reporting and choose a client from the filter (this enables Generate).
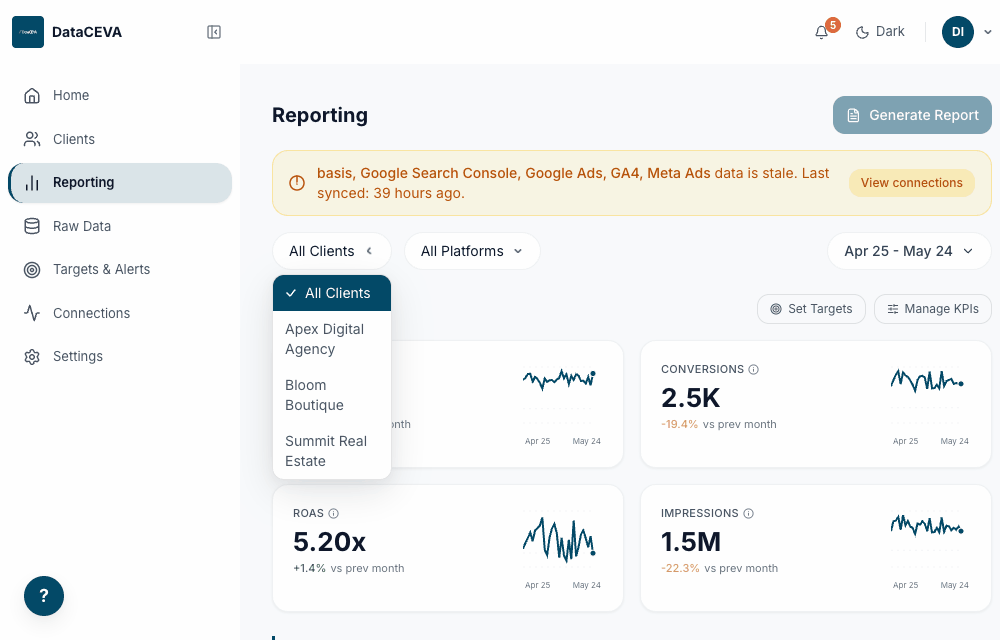
You'll see that client's metrics, charts, and per-platform scorecards update.
Click Generate Report, choose the sections to include and a delivery method.
You'll see the report open in a new tab (browser) or download as a PDF.
Switch to the Schedule tab to send a recurring PDF automatically.
You'll see name, frequency, time, sections, and recipients; Save Schedule sets it running.
Review the report
The report opens white-labeled with your agency's logo and colors. Use Print / Save as PDF to export.
You'll see a clean, client-ready document with no "Agency OS" branding anywhere.
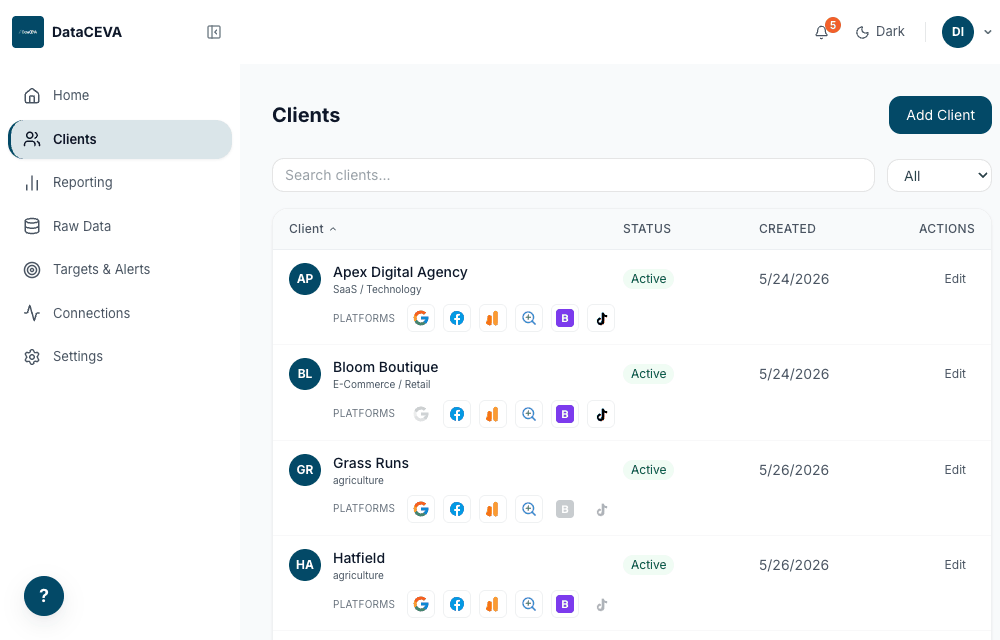
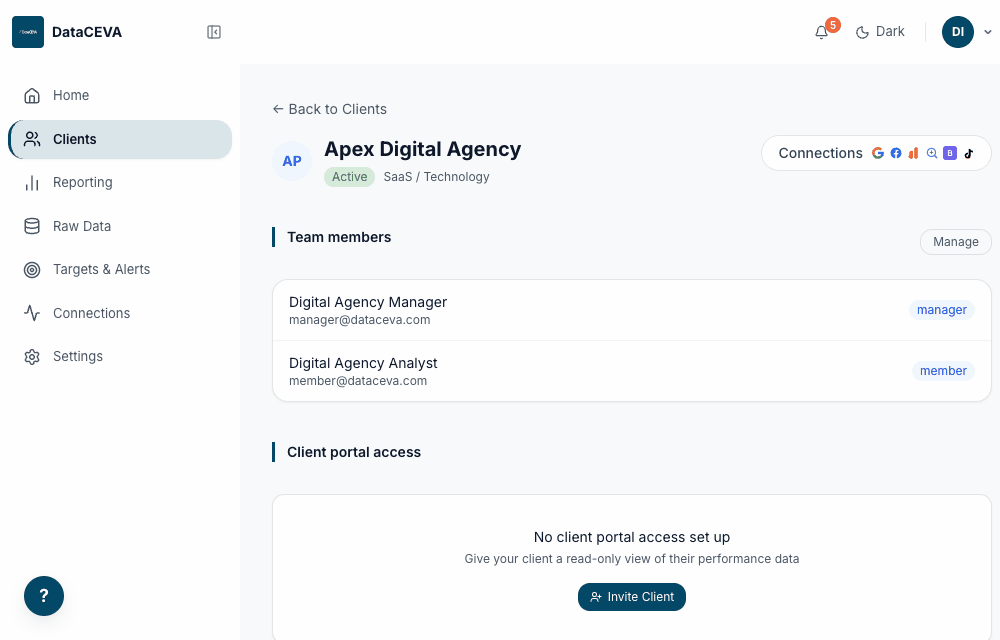
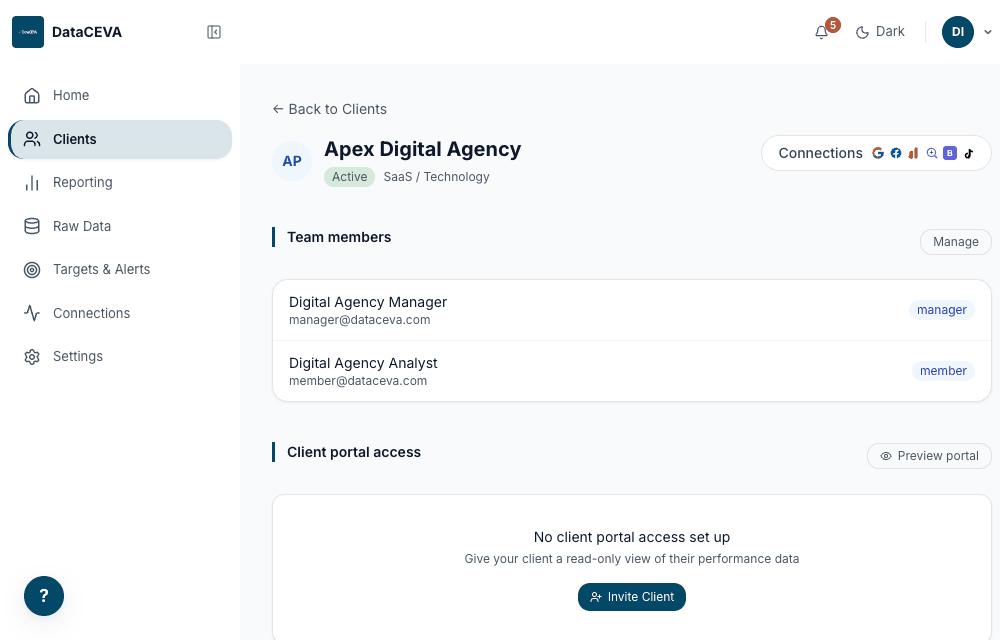
Go to Clients and open the client you want to give access to.

You'll see the client's summary, team members, and a Client portal access section.
Scroll to Client portal access, click Invite Client. Choose Email a magic link (client gets a one-click sign-in email) or Set a password (no email; you share the credentials directly). Enter name, email, and send.

You'll see the contact appear with an Invited badge. Once they sign in it turns Active.
4Onboard a client to the portal
Go to Clients and click the client you want to give portal access to.
You'll see the client list; click any row to open the client detail page.
On the client detail page, scroll down to Client portal access.
You'll see an empty panel with an Invite Client button, or existing portal contacts if any are already added.
Click Invite Client to open the Grant portal access dialog.

You'll see two access methods: Email a magic link (default) and Set a password.
On the Email a magic link tab, enter the contact's name, email, and an optional message, then click Send Invitation.
You'll see "Invitation sent". The client gets an email with a one-click sign-in link. No password to manage.
Switch to Set a password, enter name and email, click the refresh icon to generate a strong password, then click Create Access.

You'll see the generated password ready to copy. No email is sent; share it directly with your client.
Close the modal and check the Client portal access panel.

You'll see the contact row with an Invited badge (waiting for first login) or Active once they sign in, plus their last login time.
Click the ... menu next to the contact and choose Delete access.

You'll see the contact removed instantly. They can no longer sign in to the portal.
5What your client sees in the portal
Overview page
After signing in, the client lands on Overview: headline KPIs (Total Spend, Conversions, ROAS, Sessions), a daily spend trend chart, and a date range picker. Click View full report to go deeper.
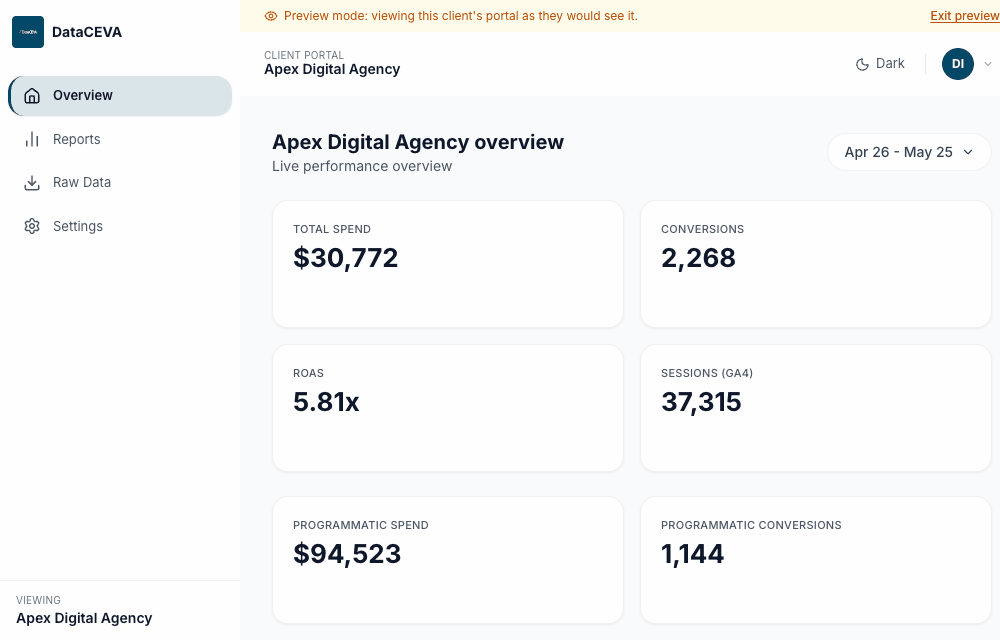
They'll see only their own client's data. No other clients appear anywhere in the portal.
Full report breakdown
On Reports, the client can filter by platform (Google Ads, Meta Ads, GA4, Search Console) and adjust the date range. Trend charts and a campaign table update to match.
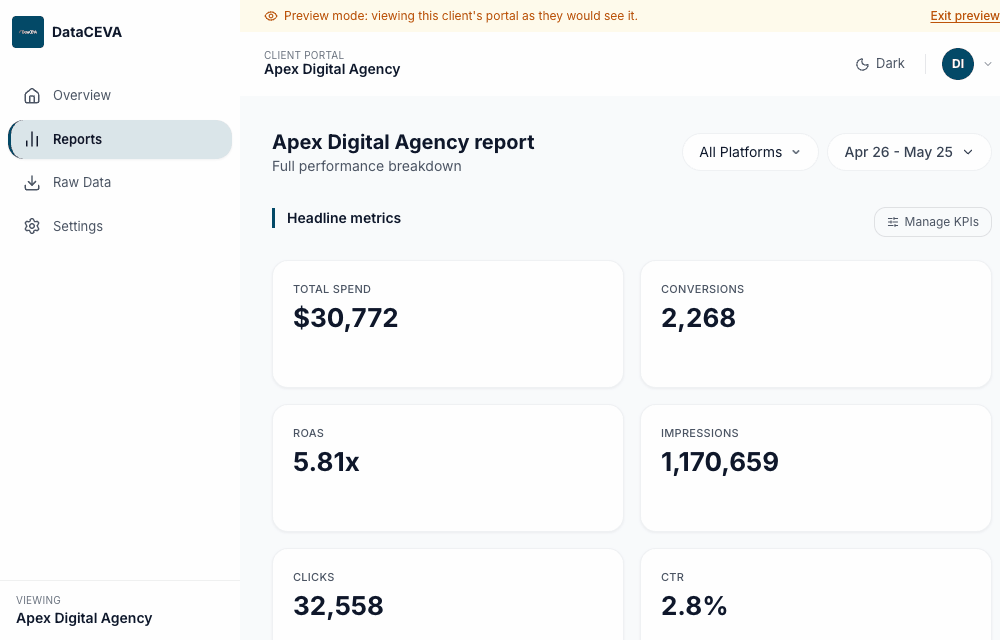
They'll see spend trends, conversions, ROAS, GA4 sessions, Search Console performance, and per-campaign breakdowns depending on which platforms are connected.
Customize which KPIs are shown
The client can click Manage KPIs to choose which metrics appear in the headline grid. Their selection is saved in their browser.

They'll see a checklist of all available metrics: Spend, Conversions, ROAS, Impressions, Clicks, CTR, Revenue, Sessions, Users, Engagement Rate, Bounce Rate, and Search Console metrics.
Portal settings
Under Settings, the client can set their own display name, logo URL, and brand colors. This overrides the agency's default branding for their portal only.
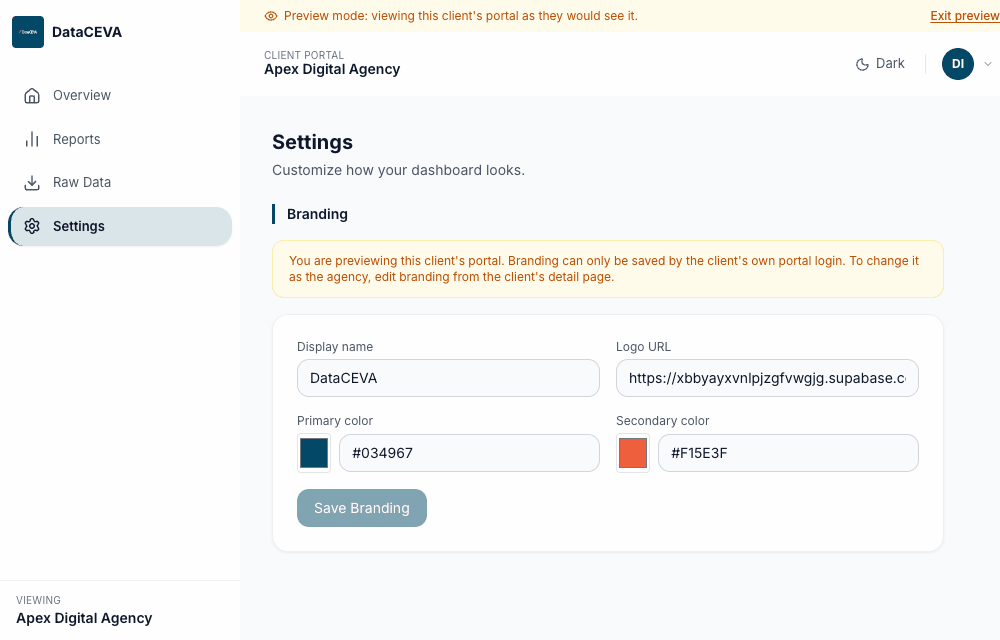
They'll see branding controls with a color picker and logo URL field. Changes apply immediately to their portal.
| Feature | Available to portal client | Notes |
|---|---|---|
| KPI headline cards | Yes | Spend, Conversions, ROAS, Sessions + more via Manage KPIs |
| Daily trend charts | Yes | Spend, conversions, ROAS, sessions |
| Campaign table | Yes | Read-only, expandable by ad group |
| Platform filter | Yes | Google Ads, Meta, GA4, GSC, Basis, TikTok (if connected) |
| Date range picker | Yes | Any custom range |
| Search Console data | Yes | Keywords, search terms, geo breakdown |
| Raw data download | Yes | From the Raw Data page |
| Portal branding (own) | Yes | Display name, logo, colors |
| Other clients' data | No | Strictly scoped to their client |
| Campaign management | No | Read-only throughout |
| Targets and alerts | No | Agency-side only |
| Platform connections | No | Agency-side only |
| Team management | No | Agency-side only |
RWho can do what
Admin
Everything, plus Settings: connect platforms, manage the team, control portal access.
Manager
All clients, reports, targets, and client invites. No Settings.
Member
Only assigned clients. View and report; no team or settings.
| Action | Admin | Manager | Member |
|---|---|---|---|
| View Home & Reporting | Yes | Yes | Assigned |
| Generate / schedule reports | Yes | Yes | No |
| Create targets & alerts | Yes | Yes | Assigned |
| Connect / reconnect platforms | Yes | View only | View only |
| Invite a client to the portal | Yes | Yes | No |
| Manage team & settings | Yes | No | No |